Modding Fallout 4 on Linux
And Now For Something A Little Different
Hey there! A little off topic to most that visit that blog, normally I’m prattling on about Cisco Unified Communications! Not today… normally when I don’t have anything interesting to talk about I just don’t post. But with the 30 day Linux challenge that’s underway it gives me opportunities to cover issues and things I ran into on Linux and hopefully help someone!
So after switching to Arch Linux and wanting to do a little gaming… and a lot of preparation… I decided I would set up one of the games that I enjoy playing when I have a few solid hours to put into progression. That’s Fallout 4… but not just any Fallout 4, modded Fallout 4. I think we all have to admit that the modding community is what gives the Elder Scrolls games such permanence in people’s game library. It can be as ridiculous as you want… want to kill a (dragon) Thomas the Tank and absorb it’s soul? You can do that. Want to play as an anime cat girl? You can do that. Want to have anthropomorphic My Little Pony characters as followers? I don’t, but you might… and you can do that!
Main Goals For Fallout 4 Install
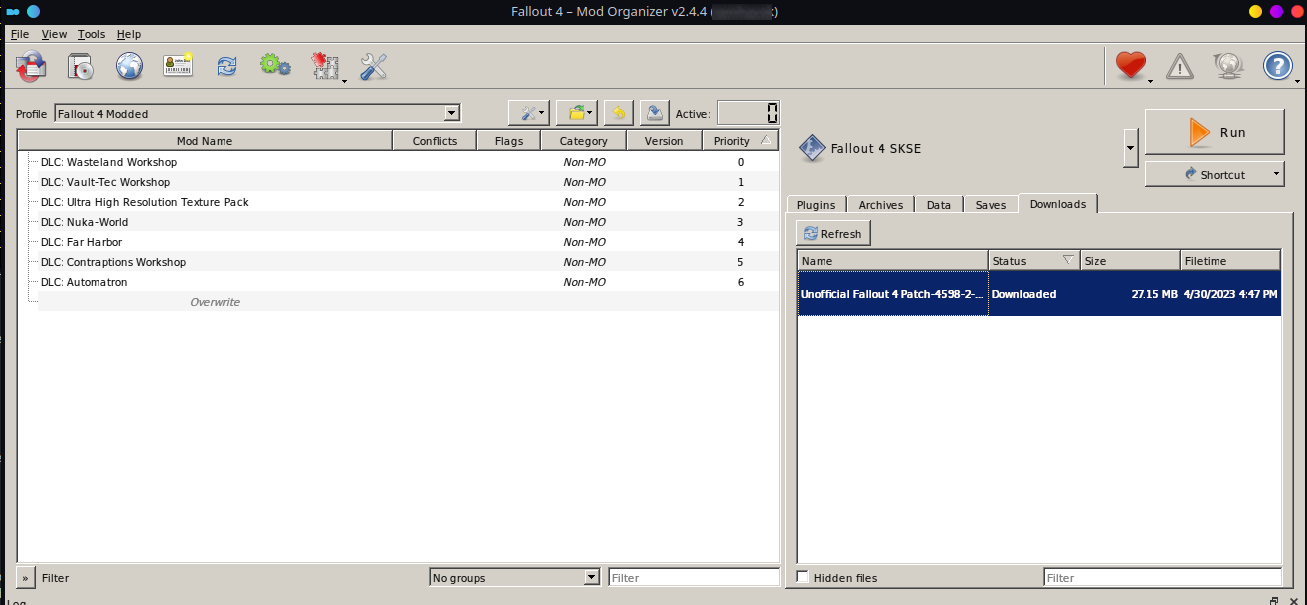
Let’s get back on topic. The main things I set out to do were as follows: 1) Install Fallout 4 with a working/proper Proton version for modding. 2) Install Mod Organizer 2 to organize my mods, handle mod downloads, ini file edits and to launch F4SE. 3) Fallout 4 SE (f4se) as the script extender is needed for quite a few mods. Let’s make it 4 goals – 4) to have it be working.
I have to say, although there was a little jankery along the way and I cannot for the life of me find the ‘profiles’ folder that contains the actual profile data, the typical locations I would expect in WINE (Windows) just aren’t cutting it. Profiles work, and editing the profile’s .ini files through Mod Organizer 2 works well enough.
This whole thing started from me watching a Youtube video where someone plays through Fallout 4 in Survival (hardest difficulty) with a mod that increases their movement speed by 1% of the base (1 unit, base 100 unit move speed) for every kill. It ended with me still installing mods and setting it up just right, but hey, it’s working and Fallout 4 itself loading, while modded, is the fastest program launch I’ve ever witnessed. Mod Organizer 2 lags really, really bad. But if you can tolerate it you can use it for modding. Otherwise you have to go about this entirely manually and I will not be covering that process.
Alright. Enough of the fluff and onto the steps.
Get Ready, Get Set, Go!!!
A few things to make sure you have installed before starting… namely protontricks, wine, winetricks, 7zip, aur helper (yay, yaourt). I will discuss protontricks, wine, winetricks, p7zip and configurations within mod organizer 2. I will not be covering setting up yay or yaourt, or a detailed explanation behind AUR. You will also need steam installed, logged in, and sufficient storage space available.
1. Open Steam and right click "Fallout 4" > Compatibility > Force the use of a specific Steam Play Compatibility tool (click this).

2. Use proton 6.3-8 as recommended by Mod Organizer 2's Linux install. You can try using a newer proton, or the experimental branch. YMMV.

3. Disable Steam Overlay if enabled. It's been known to drag down game performance.

4. Now install Fallout4 through Steam, as enabling the Proton layer should allow the game to install.

5. Once it completes the install, run the game once. When you're at the menu screen close the game.

6. Download the latest release of Mod Organizer 2 for Linux from [RockerBacon's Github](https://github.com/rockerbacon/modorganizer2-linux-installer).
    a. Look under the latest release section and download the .tar.gz file
    b. Move/unpack the tar file and review the install.sh file
    c. Instructions below
        i. Make a directory for the tar files, then cd into new directory. This assumes you downloaded into the user's Download folder.
            cd ~/Downloads/ && mkdir mo2installer && cd mo2installer
        ii. Copy the downloaded tar file into modorganizer 2, unpack, and delete the .tar.gz file
            cp ~/Downloads/mo2installer*.tar.gz ./ && untar mo2installer*.tar.gz && rm mo2installer*.tar.gz
        iii. Using your preferred file editor, open the install.sh file to review before you run. Otherwise run the install script.
            ./install.sh
    d. Follow along the installer and when done, hit complete.

7. Set up some pre-requisites
    a. Using Pacman, install wine, winetricks, and 7z.
        sudo pacman -S --needed wine winetricks p7zip p7zip-plugins
    b. From AUR, install protontricks. I use yay, substitute the syntax for your package manager.
        yay -S protontricks

8. At this point launching Fallout 4 from Steam will yield a Mod Organizer 2 window, and a terminal shell. Minimize the terminal shell.
    a. Click next
    b. Click "Create a Global Instance"
    c. Click "Fallout 4" from the list of games.
    d. Click "Next" using the default name Fallout 4
    e. Select the location of where the data will be stored. I chose the default, C:\users\steamuser\AppData\Local\ModOrganizer\Fallout 4 (this is a Windows location within Wine).
    f. Connect to Nexus and login with your Nexus Mods credentials. Click "Authorize" and go back to the MO2 window.
    d. Click "Next" on the last page to finish. Do the tutorial, or don't.
    e. Associate it with NXM links, if you so choose.

9. Install SKSE
    a. Navigate to the location where Fallout 4 was installed. For me this was "Z:\home\kenp\.local\share\Steam\steamapps\common\Fallout 4\Fallout4.exe"
    b. Download the latest [SKSE](https://f4se.silverlock.org/) files (regular runtime, not VR)
    c. Copy the following files/folders into your Fallout 4 directory
        i. Data folder
        ii. Src folder
        iii. CustomControlMap.txt
        iv. f4se*.dll
        v. f4se*.exe

10. Add SKSE as a program option in Mod Organizer 2
    a. Open Mod Organizer 2
    b. Click the drop-down next to Fallout 4, click <Edit>
    c. +, Add from File
    d. Click "f4se_loader.exe". Edit the title as preferred.
    e. Click "Force Load Libraries".
    f. Save it

11. Start Fallout4 and ensure SKSE is working
    a. Click the drop-down and change it from Fallout 4 to the SKSE entry you made.
    b. Press Tilde (~) to open the console in the game
    c. Type "getf4seversion" and confirm there's valid output showing the version, as shown below.

12. Installing Mods
    a. Open Mod Organizer 2 back up and click on Tools > Profiles
    b. Click the Default profile and click "Copy"
    c. Add a new name, such as "Fallout 4 Modded" and click save.
    d. Select the new profile.
    e. Click the icon at the top that looks like 3 white and 1 red puzzle pieces (Tools) > INI Editor
    f. Click the tab for the fallout4custom.ini
    g. Add the following lines to the end of the ini file and save/close. This will "allow" modding.

--
[Launcher]
bEnableFileSelection=1

[Archive]
bInvalidateOlderFiles=1
sResourceDataDirsFinal=
--

    h. At this point things should work. Download a mod using the nxm link and confirm that Mod Organizer 2 downloads the files.
Time To Play
Alright, at this point you should be installing mods and getting your ideal modlist set up. I haven’t yet figured out how to get Reshade working, as I would love to slap a decent reshade preset on this bad boy and really pump up the lighting with a good color palette. If you’ve followed along I appreciate the read and hope this was helpful. If you want to suggest posts for the NOC Thoughts blog please visit our Discord and use the #improvements-requests channel! Good luck playing!